How to create invoices in odoo 16?
In Odoo 16 accounting, Users will find the invoice’s menu from the customers tab. The invoice window consists of various features such as,
1. Company data
With company data feature, User can prepare their company data for the header or footer.

2. Invoice layout
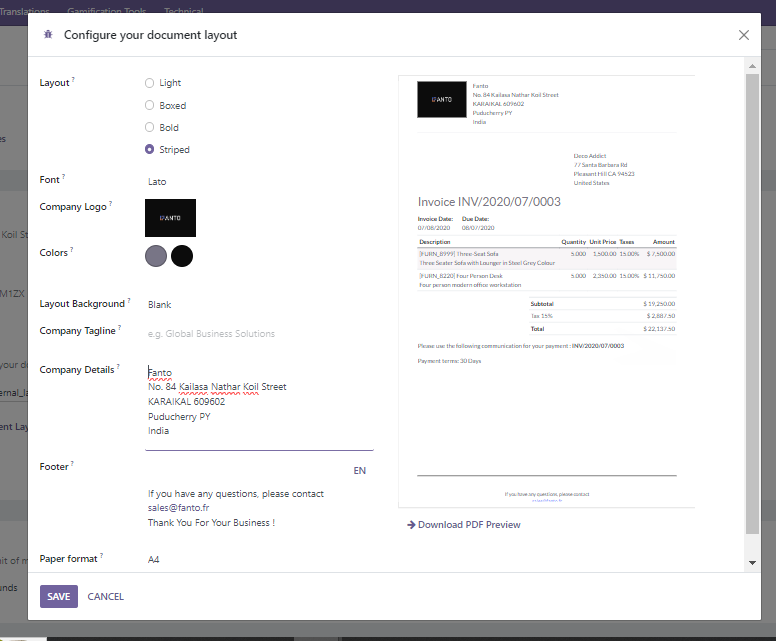
Customization of the invoice layout falls on below steps
- With the invoice layout feature, you will find a new window on your screen. Here, you can select a specific layout for an invoice such as light, boxed, bold, and stripped.
- User can choose a specific font for the invoice.
- Select company’s logo from the company logo
- Choose layout background for your invoice document.
- Set a company tag line if needed.
- You can also find another important information about your company in the Company Details
- Then Footer details, how the invoice of the document footer should show
- Finally select the paper format for which type you need to print
All the customized specific feature can be seen in the preview of an invoice on the left side. User can download and have a preview how the invoice should look
3. Creation of invoice.
Inorder to create a new customer invoice, you have to click on the invoice's menu in the customers tab. Here, click on the create button visible on the invoices window for creating a new customer invoice. As the open screen appears, put in your customer name and the delivery address will automatically be added to the invoice.
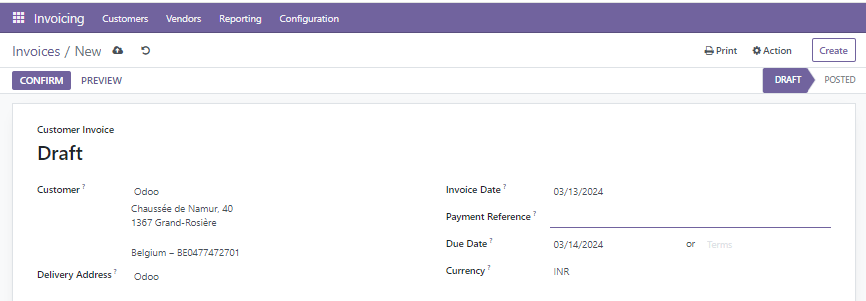
Here, you have the option to pick a specific end date or specific terms relating to the invoice payment in the Due Date field.
Now users can put in product information by picking the Add a line option as shown in the screenshot below., we have picked only one quantity, The total amount can be seen on the right end.
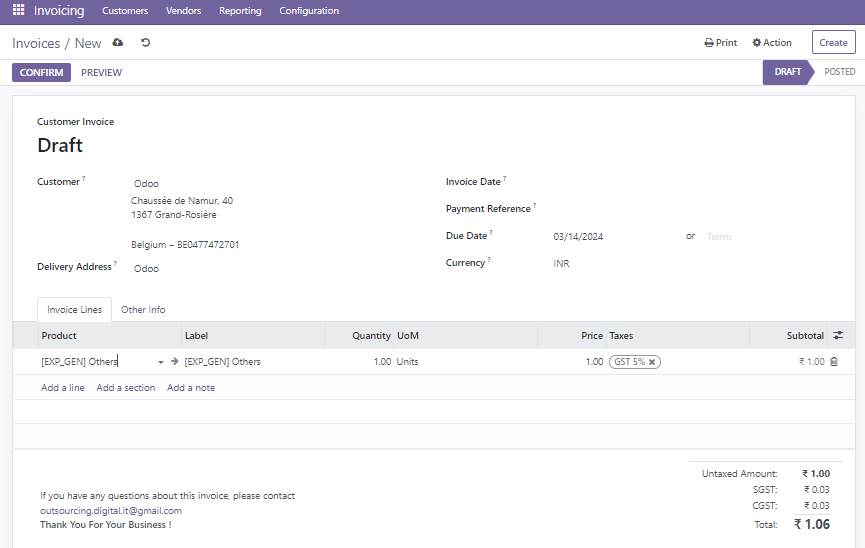
Once, you have applied all the necessary data for the invoice, it is now time to click on the Confirm button in the draft invoice.
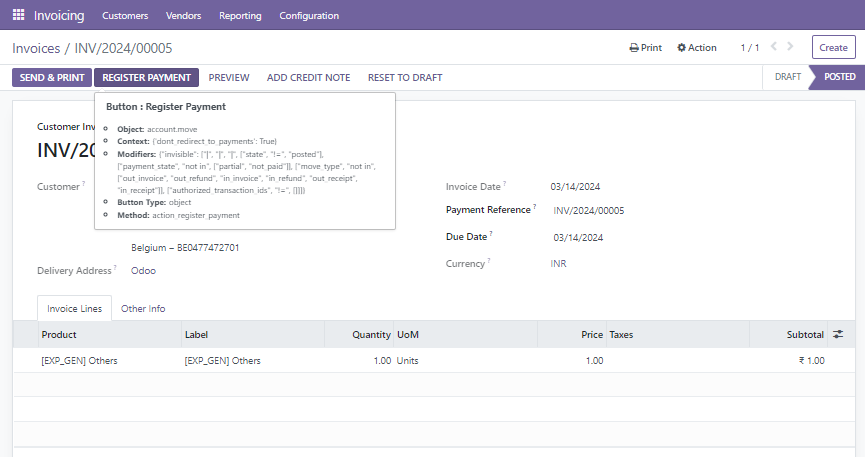
After being redirected to the Register Payment window, pick a specific journal. Post that, choose a transaction method for invoicing in the Payment Method field.

Here we can able to set a manual payment method for getting your payments from other than Odoo. Here, you will see the total amount for delivering, the payment date is present in the Payment Date field. Apart from this, you can also view the Memo. Once verified, click on the Create Payment button in the Register Payment window.
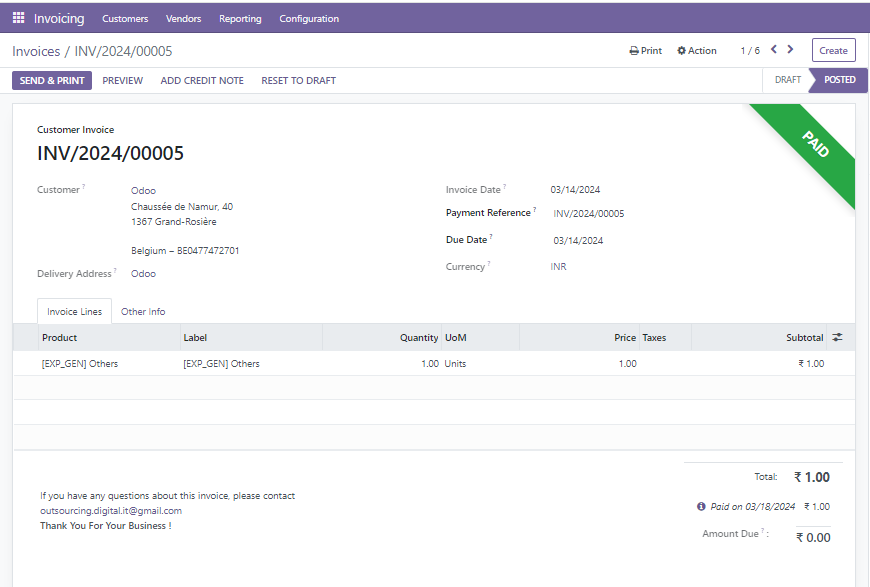
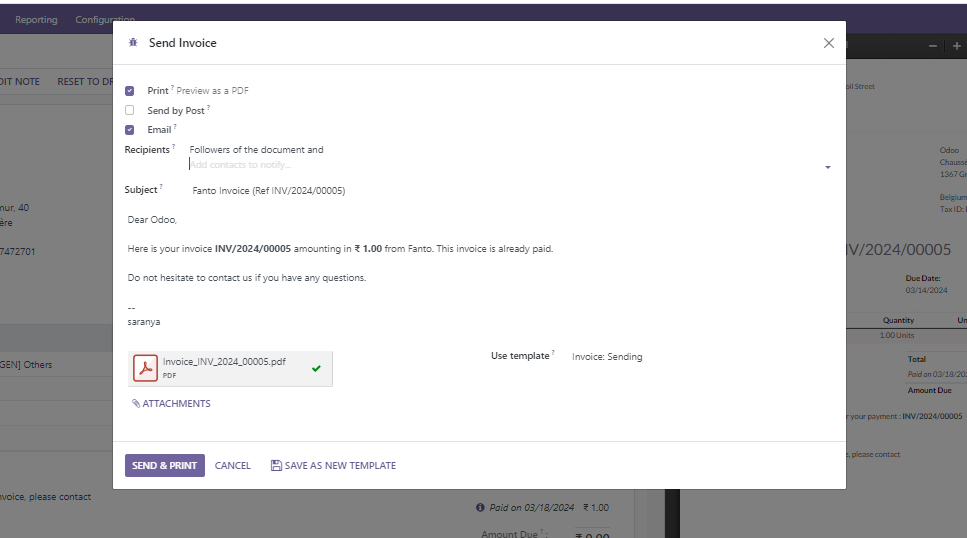
After you click on the send & Print button, users will get a view of invoices for customers in the printed document. the invoice PDF will be downloaded into your system..
Conclusion
The file layout is quite similar to the Invoice layout created in Odoo 16. All specific detail that you have added in the invoice layout document will appear on the printed file.